Pages

Tuesday 10 July 2012

Painting the Car... Finally (Part 2)


Now that the car is clean, masked and in the booth, there are a few more steps I need to carry out before mixing the paint.

Firstly I turned the booth on, so the car's panels have time to warm up. While this is happening I wiped down the car again with a clean lint free cloth. This is followed by another clean with  Grease and Wax Remover (aka Prepsol).

Get a lint free cloth and put some Grease and Wax Remover on it and wipe it onto the panels. Then use a separate clean lint free cloth to wipe it off. Do this a panel at a time, and make sure to clean the entire surface which is to be painted. Focus on the parts which have been in contact with hands such as around the door handles, as well as any areas where masking or other any other tape may have been applies.

Following this is the final bit of preparation before painting; wiping the car down with a tack rag. Lightly move the tac rag across the panels where the paint is being applied. Start at the top and work your way down, and remember to turn the tac rag when it gets dirty.

Now it's time to paint... first thing is to remember not to rush, once mixed you have hours complete the job before the paint cures.

The first base coat is a light dust coat, do not try to get coverage of colour with the first coat by applying it heavily. Coverage of the colour will come with the subsequent coats.

Here is an explanation of how I attacked the painting sequence:
1 - Start by running up the A pillar, across the edge of the roof and down the C pillar
2 - Continue on and do the back quarter panel
3 - Do half the boot lid, working from the side you are on to the centre
4 - Do half the roof working from the strip in Step 1 to the centre
5 - Go to the other side and repeat the steps, except by working from the centre of the roof and boot lid out towards the edge of the car
6 - Go back to the first side and work forward from the rear quarter and do the door
7 - Go to the other side and repeat step 6
8 - Go back to the first side and work forward from the door and do the front guard
9 - Go to the other side and repeat step 8
10 - Go back to the first side and do the bonnet, working from the top of front guard towards the centre
11 - Go to the other side and complete the bonnet by working from the centre towards the guard
12 - Spray the front around the lights

I had my front and rear bumpers removed and on stands in the booth, which I would paint once them these steps were done.

Then wait for the paint to flash off and repeat. For me it took four coats of base to get the coverage I wanted.

Obviously this is a rough guide and it can be done other ways. Some people start at the centre of the car roof and work out to the edges. However, people I have spoken to say that you should have a wet edge and work your way around the car by following this edge.

The last coat of base is very important if you are using metallic flake, as I am. Once you are satisfied with the coverage, you will need to 'dust' a coat on which makes the metallic flake 'stand up' and look awesome when the job is done. This dust coat has to be applied lightly and the spray gun has to be further away, so the coat is very dry.

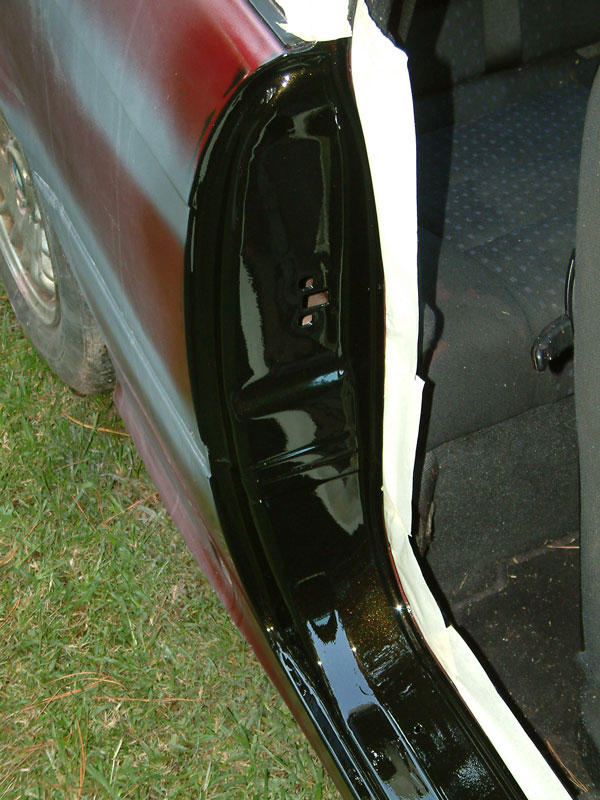
This is how my car looked once my base coats were done.


Once the base coat is ready (check your paint label for the required time), you are ready for the clear coat. This is an important one, apply it too light and it comes out looking dry, apply too heavy and it will run, but get it right and it will make you paint job stand out and look great.

I followed the same painting sequence as I did with the base coat, but with the clear I did one medium-wet coat followed by one coat as wet as I could without getting runs.

Make sure you wait the correct time between clear coats; if you don't wait long enough, the second coat will blend with the first coat and sag, causing runs. If you wait too long, the first coat will dry and the second coat will slide off it, causing, you guessed it, runs. When applying the clear there is a fine balance, but don't let it worry you, just be aware of it.


This is how my car looked once my two clear coats were done... nice!


Now it is the fun part; let the car bake and enjoy a nice cold beer while admiring your handy work.

The following day, I had my car towed back home and here is how it looked in the sun.


Coming up next is colour sanding and polishing to get rid of any imperfections... stay tuned.

Painting the Car... Finally (Part 1)

I know it has been a while since my last post, but between the wettest period in Sydney's history and having a new baby, it has been hard for me to progress with the car painting.

So last week I took some time off work, which went something like this: "Guess what, I am having a week off work" I said to my wife, "wonderful, are you doing that to help me with the baby?" she replied naively. "No, I need to finish painting the car" ...silence, then I swiftly ducked below the oncoming swinging hand, and it was time to start.

First, all the hi-fill primer was wet sanded with 800 grit paper. This was very fast and you have to be careful not to over do it as you will sand right through the primer back to your original paint. Just wet sand all areas until they are smooth.


Next it was time to get a tow to the spray booth.


Now the hard but exciting part; final prep, masking and painting. Once you are at the booth (or converted garage) and you are getting ready to paint, you will need to clean the car. Needless to say, do not do this in the booth or you will get dust in there and eventually in your paint job.


Firstly blow all the dust off the car using your compressor and air blow gun. Make sure you get into all the nooks around the window, under the cowling (aka scuttle),  in the door and boot jambs, around the wheels and under the car.

Then get an old rag or sponge and clean the wheels, wheel arches and underneath. If you use water for this part, you should to wait for it to dry before painting. And finally, get a clean, lint free rag and get all the fine sanding dust of the car body and glass.

Now get the car in the booth and mask it off. The masking process is time consuming and not much fun. When masking up the car you have to make sure all the areas you do not want painted are covered.


When you begin to paint, all the airborne paint particles will get into any little gaps which have been left unmasked, so make sure you do this step properly. Mask off all the glass, inside door and boot jambs, over then engine and cover the wheels and suspension.


Take your time with masking everything up as it will save you from having to remove unwanted paint later if it is not done properly. Now, after all the hard work, comes the fun bit... applying the paint

Thursday 17 May 2012

Painting the Primer

Time to even out any imperfections in the body with a bit of body filler and hi-fill primer, then the beast will be ready for final sand and paint.

The paint on the roof and front of the bonnet had cracked and peeled quite badly, as well as having stone chips across the front. I have to sand these areas quite deeply, and back to metal in some places; it is these areas which will need the most work.

Anywhere bare metal was showing needs etch primer. I just used a quality brand (Wattyl) of etch primer in a can to do this. Easy.

Now time to mix the primer. Once again follow the mixing ratios from the manufacturer; my primer was mixed 2:1 with hardener. I used this mix in the heavily sanded areas and anywhere etch primer was used. Then I thinned it down with 15% thinners for the remainder of the car. The reason for thinning was because the body was quite straight and it really didn't need such a thick coat of hi-fill.

Applying primers is a piece of piss. The only real advice I can give here is that primer dries quickly and makes a mess of your gun and mixing tools. Make sure you clean it as soon as you can otherwise you will be left with clogged and messy equipment.

Below is a progress picture of the car in primer, ready for sanding.


Thursday 10 May 2012

Repairing and Blending

In my earlier post 'Painting the Door Jambs', I mentioned how condensation of water on my freshly painted surfaces ruined it. Now it is time to repair the damage and blend the paint.

I rubbed back the damaged ares with wet 800 grit sand paper. I only rubbed back until I was through the damage, which was mainly in the clear, so I tried not to go right through the base coat. Below you can see the damaged area before and after sanding.


At this point, it was time to apply the three coats of base coat, which I fanned off at the point where the sanded and non-sanded surfaces meet. Then it was time for two coats of clear, then a coat of clear with about 15% reducer (thinnners). The clear was also fanned off at the ends and the reducer was used to help keep the fanned edges looking wet and prevent the dry spray on the ends. 

I was also given advice by a painter to apply straight thinners to finish off the blending. I was very skeptical about doing this, but with nothing to lose (well nothing I couldn't fix again), I decided to give it a go. I added a small amount of thinners to my gun cup and touched up the ends. Be very careful doing this because thinners, as the name suggests, will thin the paint and cause runs. When doing this make sure you adjust your gun to a fine, light spray because you don't want apply a heavy coat of thinners over your new paint and cause it to run.

In the end I couldn't be happier with the result, nicely blended paint, you can't even tell where the new and old paint meet. Below is a picture of the newly painted door jamb.


Now I just have to apply hi-fill primer the body as it is ready for the big event... woohoo.

Saturday 21 April 2012

Knockin’ the Shine Off


The next step I have decided to do is to begin the body work and prep for the actual paint… woohoo. So what does this involve? Preparing the body for paint by sanding and making any repairs to dented panels or cracked paintwork.

Almost instantly I have realised that I should have done this before painting the door and boot jambs. Why? Because after the sanding, I need to apply hi-fill primer and any over-spray will get onto the freshly painted jambs. I will need to mask these off and be careful not to get primer on them.

What seems like an obvious lesson has just been learnt; prep and apply all primer before painting anything!

Anyway, moving on… let’s get the body work started. I have already removed the dodgy mat black paint a previous owner has applied, so I am just left with the factory original red paintwork.

To get this ready for painting, I just need to wet sand the gloss off the clear coat. To do this I used a random orbital sander with 240 grit sandpaper followed by 400 grit sandpaper, making sure to keep the sanding area wet at all times. There is no need to sand through the clear coat, just sand off the gloss so the new paint has something to bit into. Over sanding can cause unevenness and will need to be filled and sanded flat again, so the key is just to knock off the shine. The picture below is of the rear quarter after sanding and etch priming.


Any areas where the paint is cracked (like in the picture below) I will need to sand deeper, and in many cases right back to metal. On my car I have quite a few badly cracked sections on the roof and bonnet, so this will be more time consuming to sand and repair


To remove cracks, I have sanded through the clear coat and deep into the base coat until the cracked paint is sanded flat. In the picture below you can see half the roof has been sanded to remove the cracks. These areas will need extra coats of hi-fill primer and sanding with 800 grit paper prior to final painting.


Any area where the paint has bee sanded back to bare metal, etch primer will need to be applied. Etch primer will adhere to the metal and provide a surface for the hi-fill primer to bond to. It is very important that any bare metal be coated with etch primer before applying any other type of paint. The picture below is my car after being sanded and etch primed, and ready for hi-fill primer.


Wednesday 18 April 2012

Painting the Door Jambs


For the next step of my project I decided to sand and paint the door jambs. This involved a thorough clean followed by a sand with 240 then 400 grit sand paper (just like to boot). Then apply the 3 coats of base coat followed by 2 coats of clear.

When it came time to paint the clear coat, I tried to apply it wetter (heavier) than previously in order to avoid the orange peel effect. Applying paint wet is a fine line, if I do it too wet and the result will be the dreaded runs and it was just my luck/skill level that I managed to get runs in the clear coat on both doors.

In the picture below, you can see the runs are most prominent around any holes. It is in these areas where the paint collects and then begins to run. If you get runs, it is very tempting to touch them to get rid of them; don’t do this! You have to let the paint dry then sand them off and touch up the paint.


To further ruin my attempt it began to rain and as I was working outside, the rain fell on my freshly painted door sills. This damage can be seen in the picture below, it is the uneven texture in the gloss at the bottom.


All the areas where the water damage occurred will need to be sanded and repainted… god damn it! Guess I will have to learn to repair and blend the paint… just another thing to add to this already steep learning curve.

Wednesday 4 April 2012

Painting the Boot

It was a nervous moment, but finally the first paint is mixed, poured into the gun and spayed on the car!

Here's how it went down as well as some pics of the results...

The equipment set up:

I had my spraying equipment set up the following way; 2Hp compressor > water trap > shortest hose I could use, about 10m long > a pressure regulator at the base of the spray gun. Ideally another smaller water trap can be used at the base of the gun to catch any moisture build up which occurs in the hose... remember the longer the hose, the more moisture will build up and get into your paint.

I brought myself a HVLP (High Volume Low Pressure) spray gun, so as you can imagine it atomises a lot of paint with relatively low pressure, so it is important to set it up correctly to ensure nice coverage while avoiding applying too much paint and causing runs. I had the gun set at 3psi, then checked and adjusted the fan coverage on a piece of cardboard before aiming it at the car.


Mixing the paint:

What I have below is just a guide, your paints and ratios may differ. Make sure you read the product information and MSDS for your paint and follow them to the T.

For mixing the paints I used a mixing cup I purchased from the paint store; these have markers on the sides so you can get your rations exact. Then I used an old clean mug to scoop the paint from the tin and an old metal ruler to mix the paint.

The base coat:

I mixed my base coat paint with medium drying thinners at a ratio of 60% paint and 40% thinners. This ratio can be altered slightly depending on ambient temperature or until you get a nice milk-like consistency of the paint as it is running off the stirring stick.

With my base coat paint mixed I poured it into the gun and began the painting process.

I tried to keep the gun about 30cm away from the surface I was painting, hitting the hardest to reach places in the back of the boot first and working my way out.

Although it is difficult amongst the nooks n crannies of the boot space, I tried to keep the gun perpendicular (at an angle of 90 degrees) to the surface I was painting. I overlapped my prior stroke by 50% until all the metal I need painted was covered.


When doing this it is important and especially difficult in tight spaces to keep the air hose from coming in contact with the painted surfaces, so be aware of it. A good idea is to sling the hose over your shoulder so it follows your arm down to the gun rather than have it hanging down.

Once the first coat was done, I waited 8-10minutes for the flash off time (as recommended by the paint manufacturer) before applying another coat. The I applied a second and third coat in the same way.

Once done I cleaned all my equipment thoroughly with general purpose thinners.

The clear coat:

Before applying the clear coat, I had to leave the base coat dry for at least 30minutes, so time for a cup of beer. The clear I used is mixed at a ratio of 2 parts clear to 1 part hardener.

A word of WARNING: the hardener for the clear contains isocyanide, a close relative of cyanide! Unless you want to die like Hitler's wife, do not mess with this stuff... wear all the protective clothing, gloves, glasses and most importantly respiration equipment.

Once mixed, I applied three coats of the clear in the same way as I applied the base coat. With the only exception being that it did not require any flash off time between coats.


Once done I cleaned all my equipment thoroughly with general purpose thinners.

The result:

Overall I am quite happy with the result, you can see the nice finish in the mirror cover photo below. I had no runs in the paint even in the hard to reach places around the hinges where I had to apply the paint quite heavily.

However there was some evidence of orange peel in a few areas of the clear. I know there are various causes of this but as this was not across all of my work, I believe this was because I had my gun too far from some surfaces I was painting.

In the end it looks good and it was a good practice run for the rest of the car... door jambs here we come!