Pages

Monday 26 March 2012

Nose Job

Woohoo, my M3 nose cone just arrived today. The front bumper bar of the standard E36 really let's down the car's appearance and fitting one of these M3 versions is an easy way to upgrade the look.

A nice big grill, brake cooling ducts and a lower lip come together to form a sporty feel, while keeping the factory look for the E36.

Although it is an after market version, it is made of PolyPropylene which is them OEM material and unlike fibreglass bumpers it will not crack or shatter. As close to factory original without the price tag... Nice.


It's All in the Preparation

If you are seriously considering painting your car, I am sure you are aware that the finish will only be as good as the preparation you do before you touch the spray gun.

I had cleaned, sanded and cleaned again and thought I was ready to paint when the wife, god bless her, pointed out all the dirt and grime still in those hard to reach places around the lip in the corners and underside  of the boot lid.

Why don't you try the steam cleaner, she said. Wow, what a difference it made, with it I could get to all the fussy and almost impossible to reach places. Then using a scourer, sponge and toothbrush I was able to clean most of the gunk and leave a nice clean surface for the paint to adhear to.

In the picture below, you can see how clean the rear window surround is in the lower half, which has been steam cleaned, compared to the top half which has not.

These steam cleaners sell for around 30 bucks. It is well worth picking one up to help you clean those places too tight to get your fingers into. I realise there is a pun at the end of that last sentence, but seriously if you want your paint to stick you need to clean the surface and this is a great way to do it.


Monday 5 March 2012

Buying the Paint Part II

After my first experience with buying paint (see Buying the Paint post), I was scared to try again for fear of having to take out an overdraft to afford it. However the paint is a relatively important part of this project, so I decided it was time to bite the bullet and try again.

I decided to try a different paint supplier and the first thing I saw when I entered the driveway was that half the store's content was strewn all over the car park. WTF is going on? Turns out they are having a moving sale.

I went in and the guys were very helpful and best of all they have 20% off absolutely everything today only... what awesome timing to go there! Besides good service and advice, I got all the paint and supplies I need to get this project underway at a very good price.


After spending lots of time going through colour swatches, I found a pretty sweet colour - a really dark black with gold metallic.

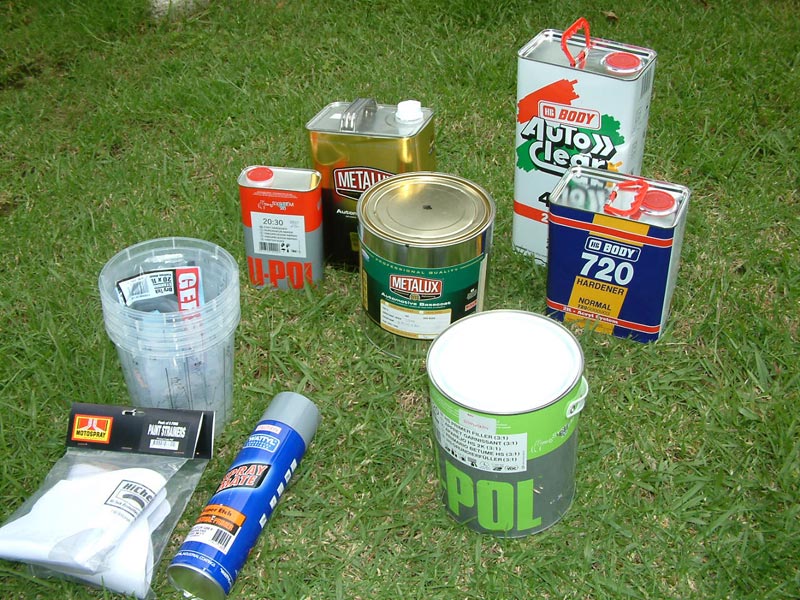
With the colour chosen, here is a list of things I purchased:
  • etch primer (cans)
  • hi-fill primer and hardener
  • base coat and slow thinners
  • high-solid clear coat and hardener
  • mixing cups
  • strainers
  • tac rags

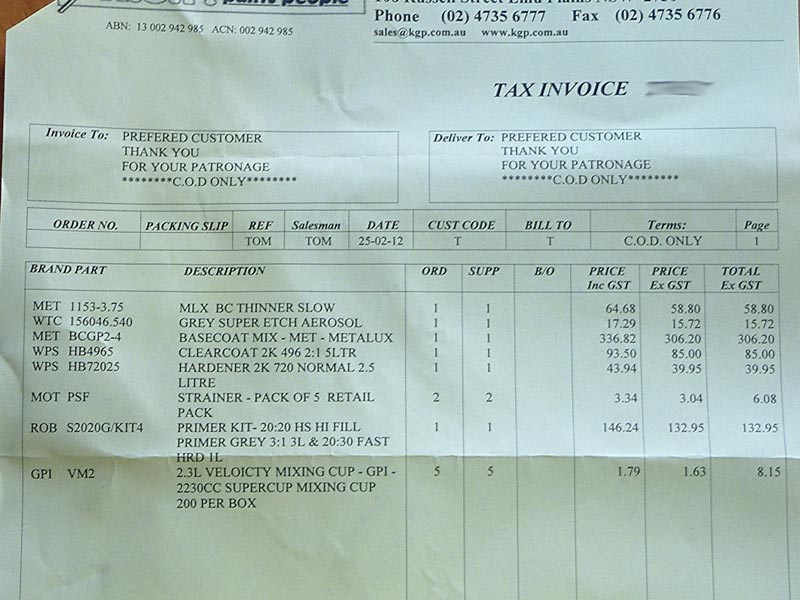
The cost for all this was just under $820. I have included a copy of the bill in case you want to see a breakdown of the costs. A big thanks to all the guys at KPG (www.kgp.com.au).

I previously also purchased 240, 400 and 800 grit sand paper which cost around $140. So that comes to a grand total of $960... within my $1000 budget, so happy days.

Now all I need is a dry week or two to actually get some work done on the car.